2019 ARM Contest
32F746G-DISCOVERY
The STM32F7 discovery kit allows users to develop and share applications with the STM32F7 Series microcontollers based on ARM® Cortex®-M7 core.
Install software
Step 1 build myST account
Step 2 download STM32CubeF7
Step 3 download and install STM32CubeProgrammer
Step 4 download and install STM32CubeMX
Step 5 install MDK-ARM
New Project
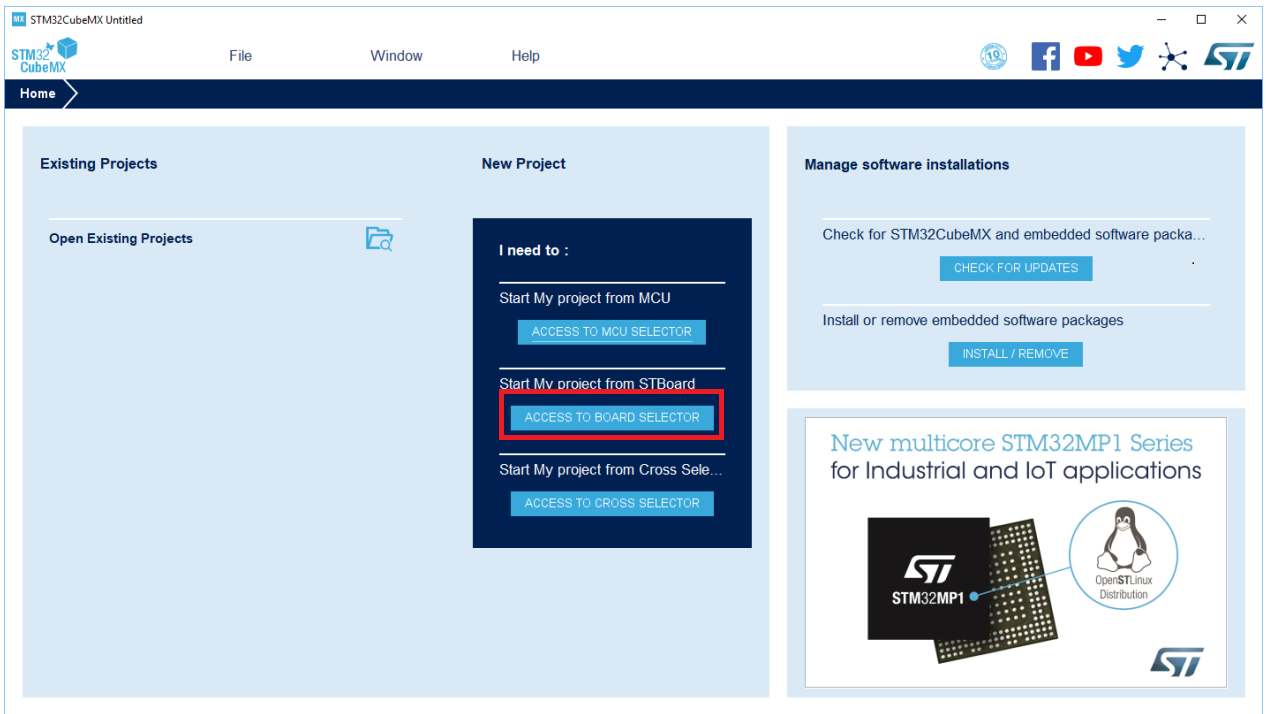
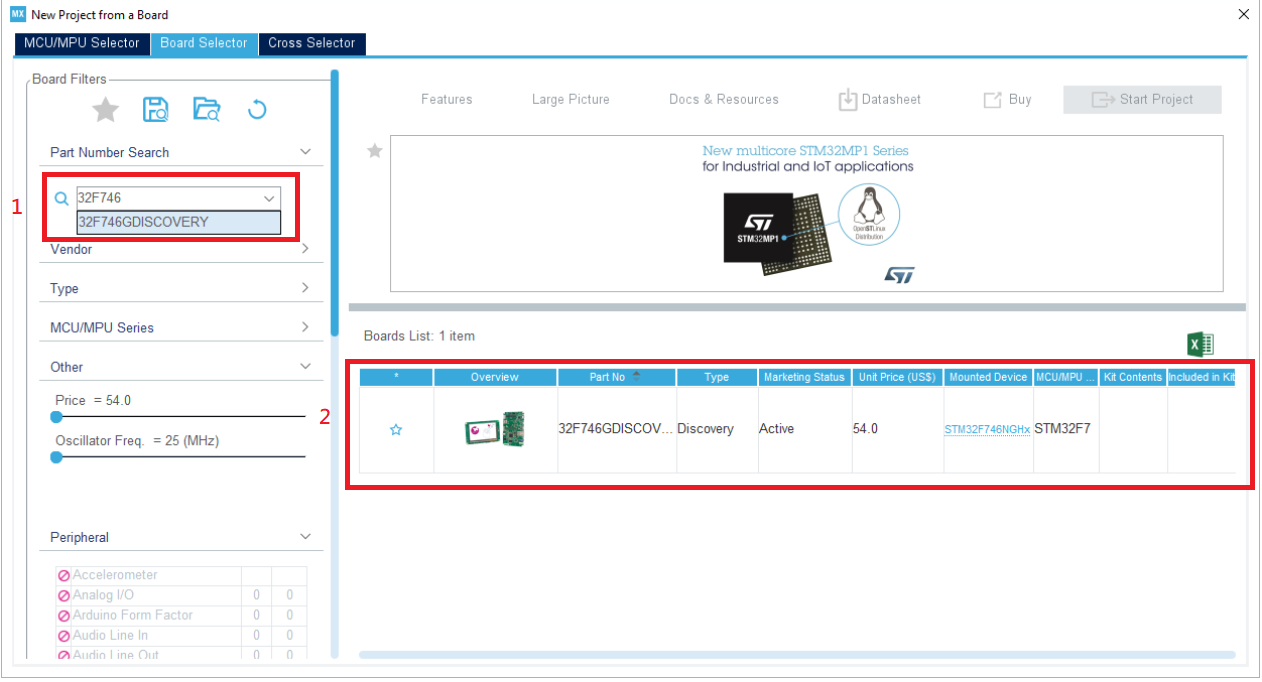
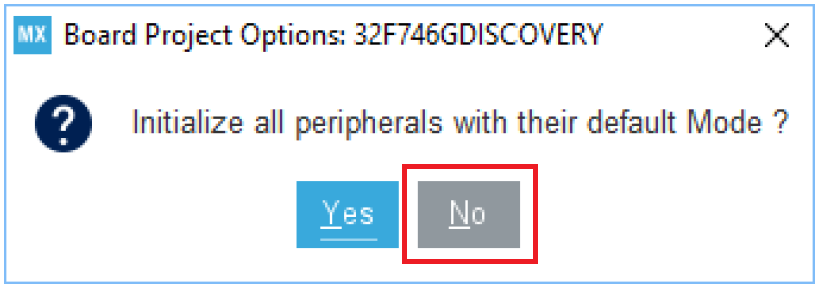
Open STM32CubeMX and select Start My project from STBoard “ACCESS TO BOARD SELECTOR”
Search “32F746” and select “STM32F746G-Disco”
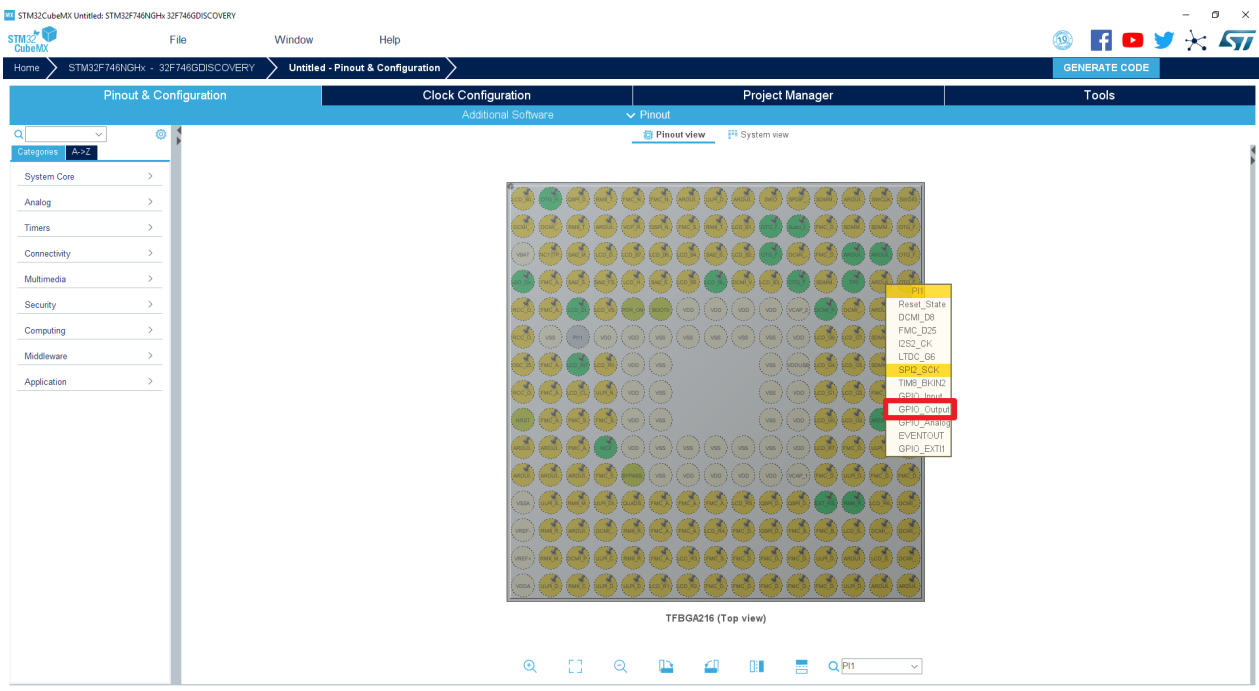
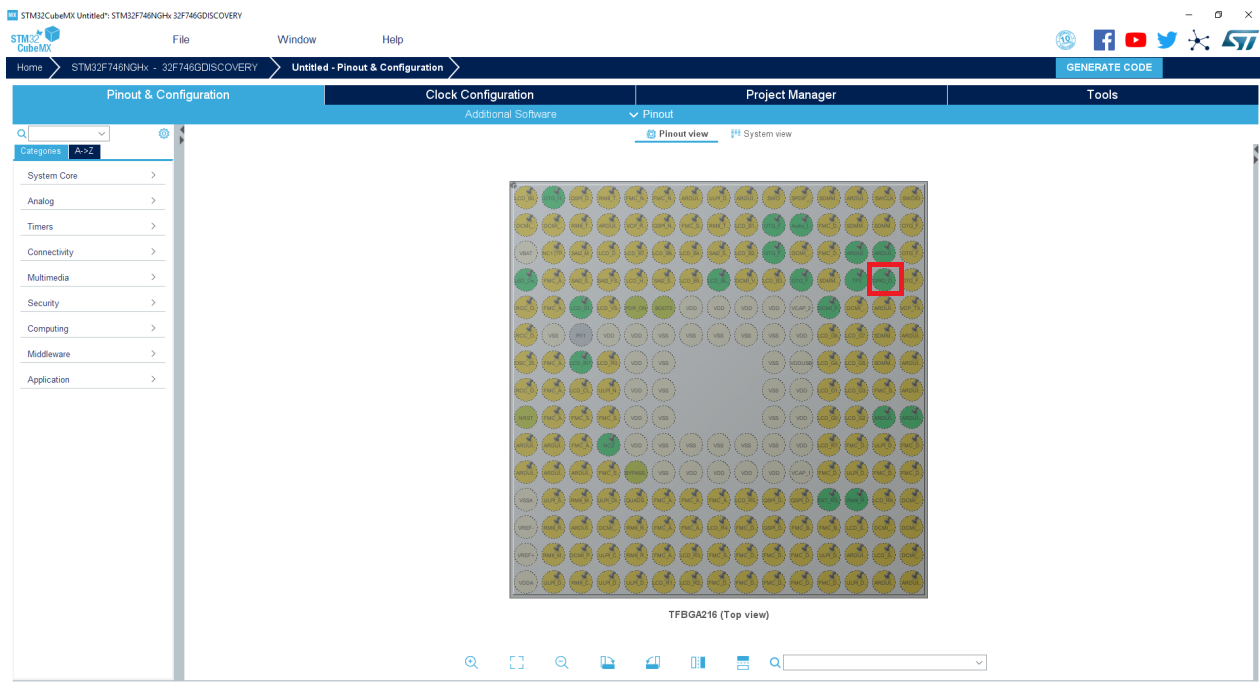
Set Port (example is PI1 set GPIO_Output)

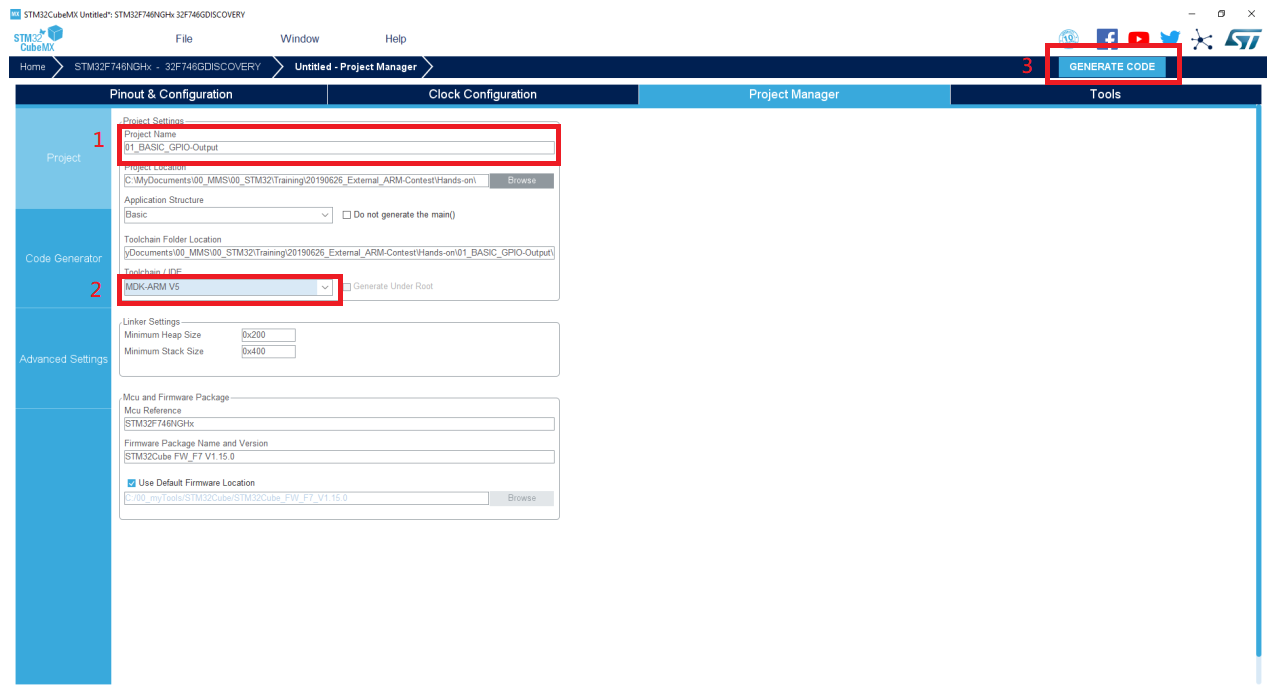
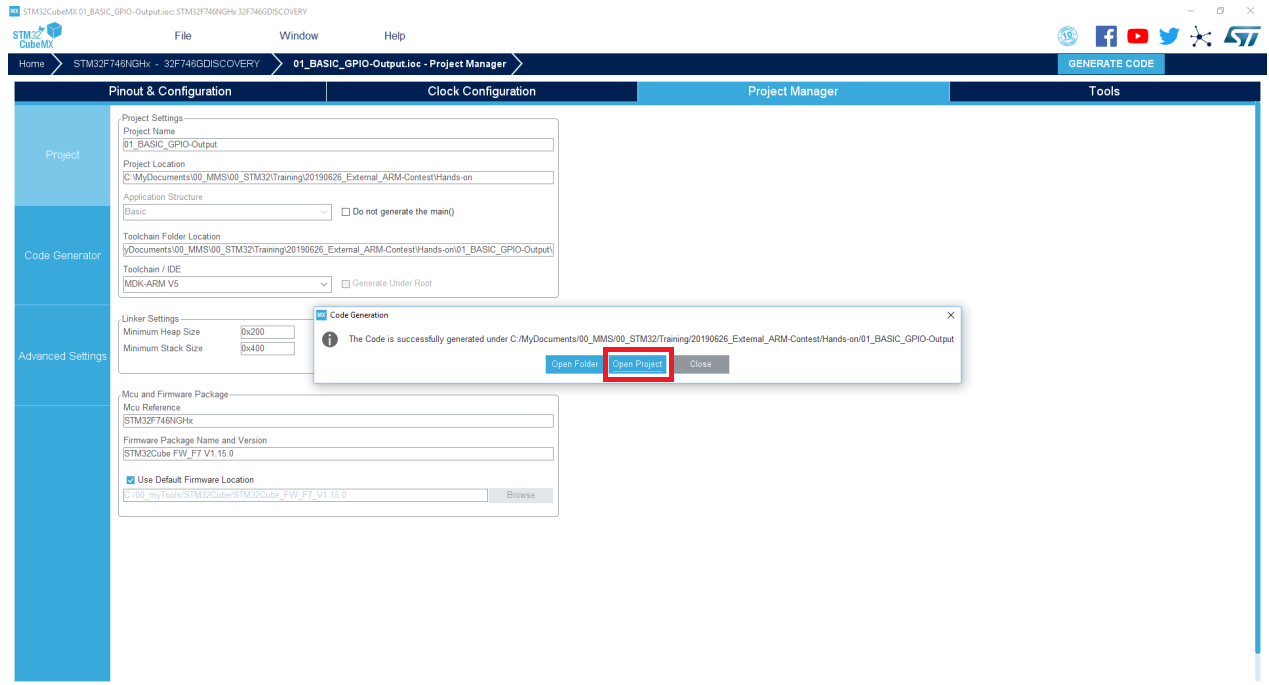
Set Project Name and Generate Code
Basic Example1
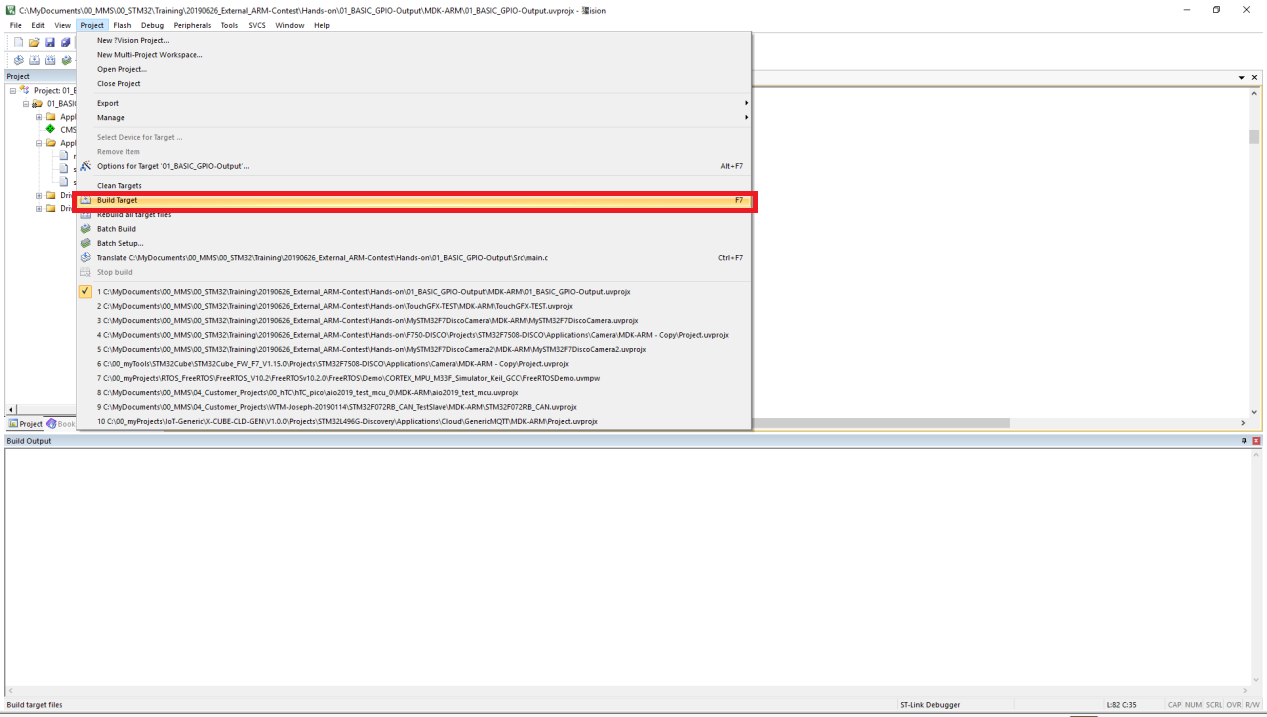
After launching MDK , then find command and edit main.c
1 | /* USER CODE BEGIN 3 */ |
Compile code and test on STM32
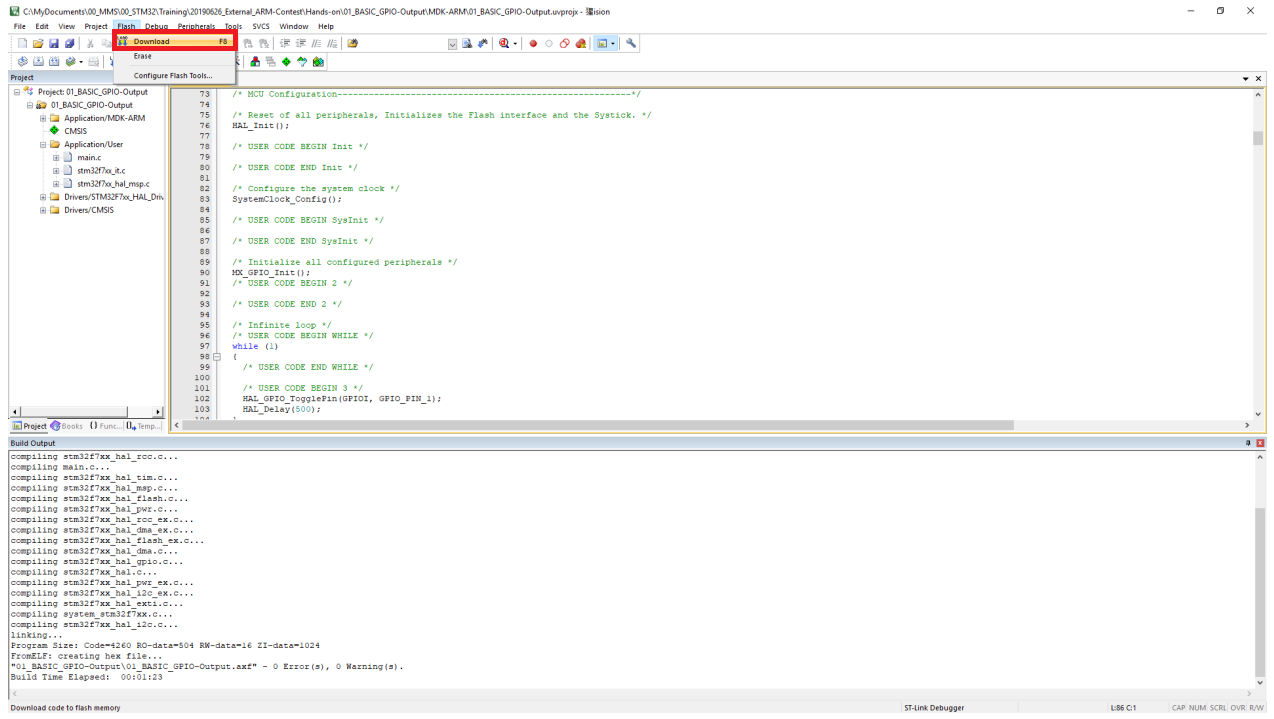
Press the Reset button (black button) and LD1 will flicker each 500ms
Basic Example2
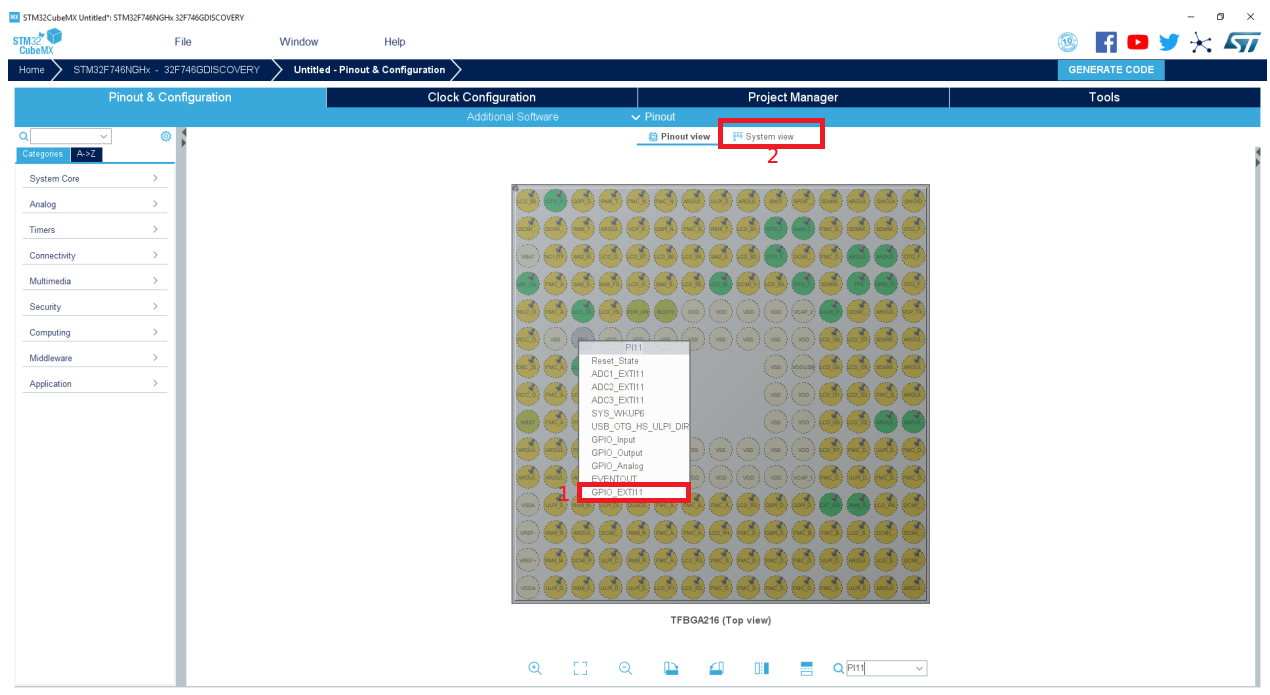
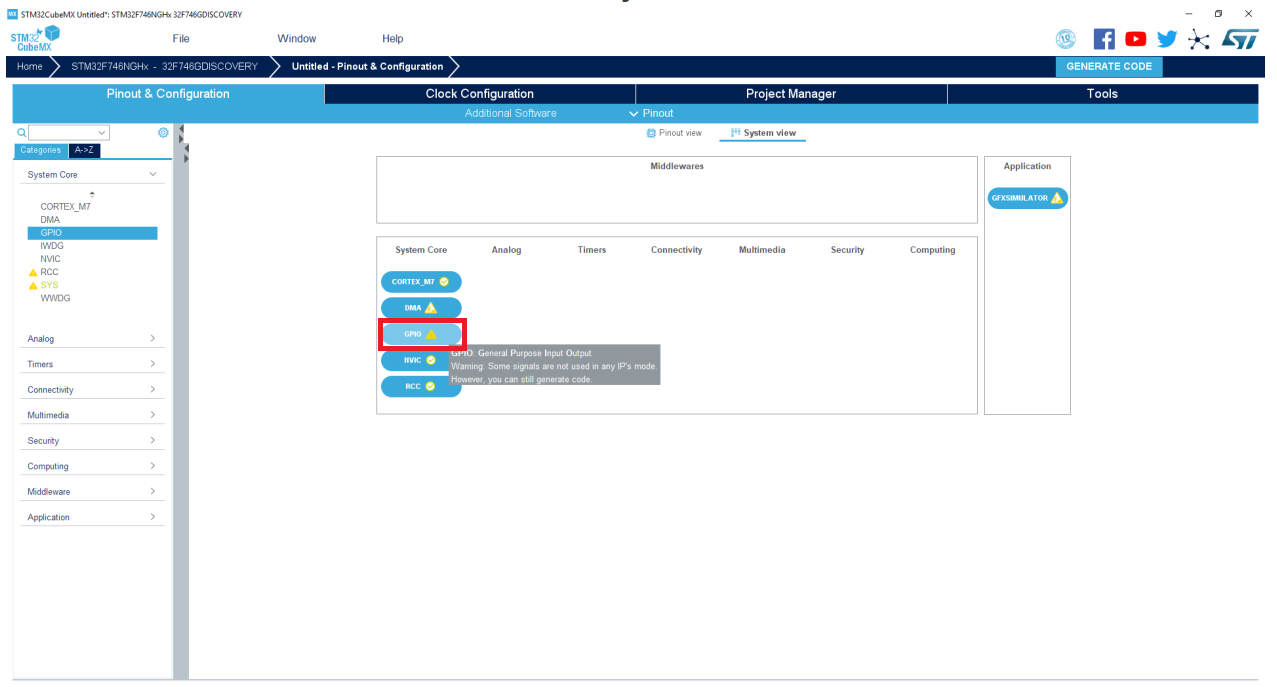
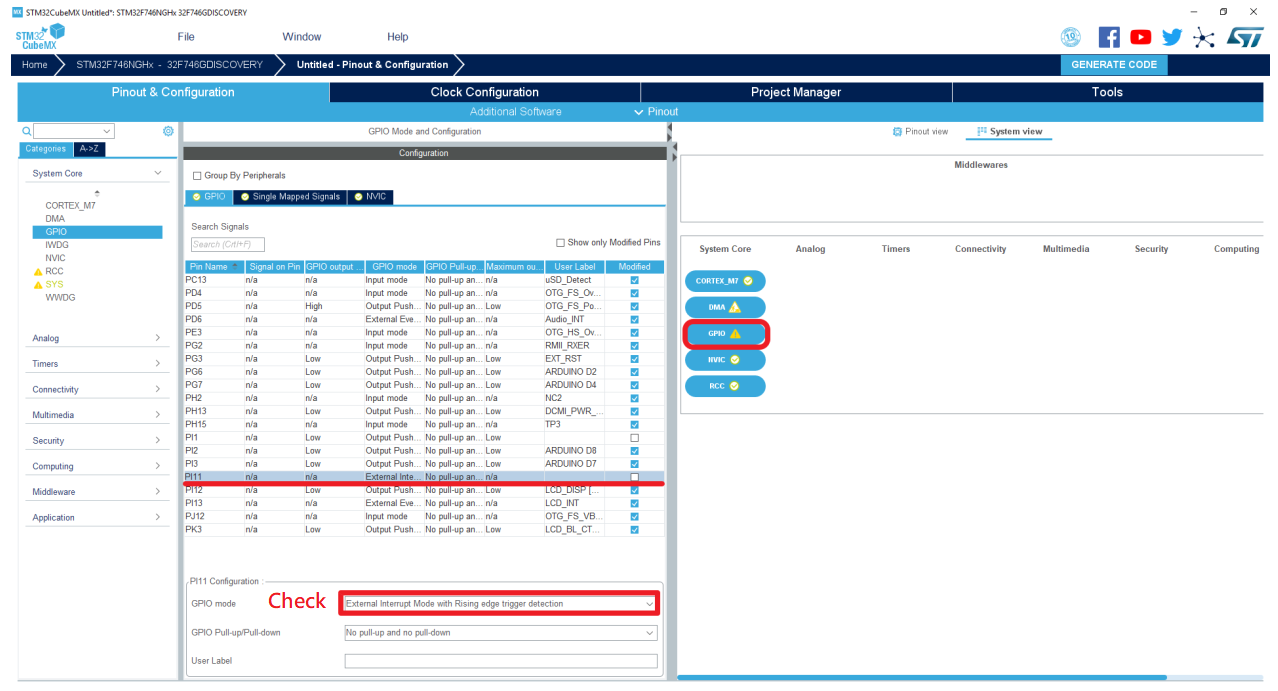
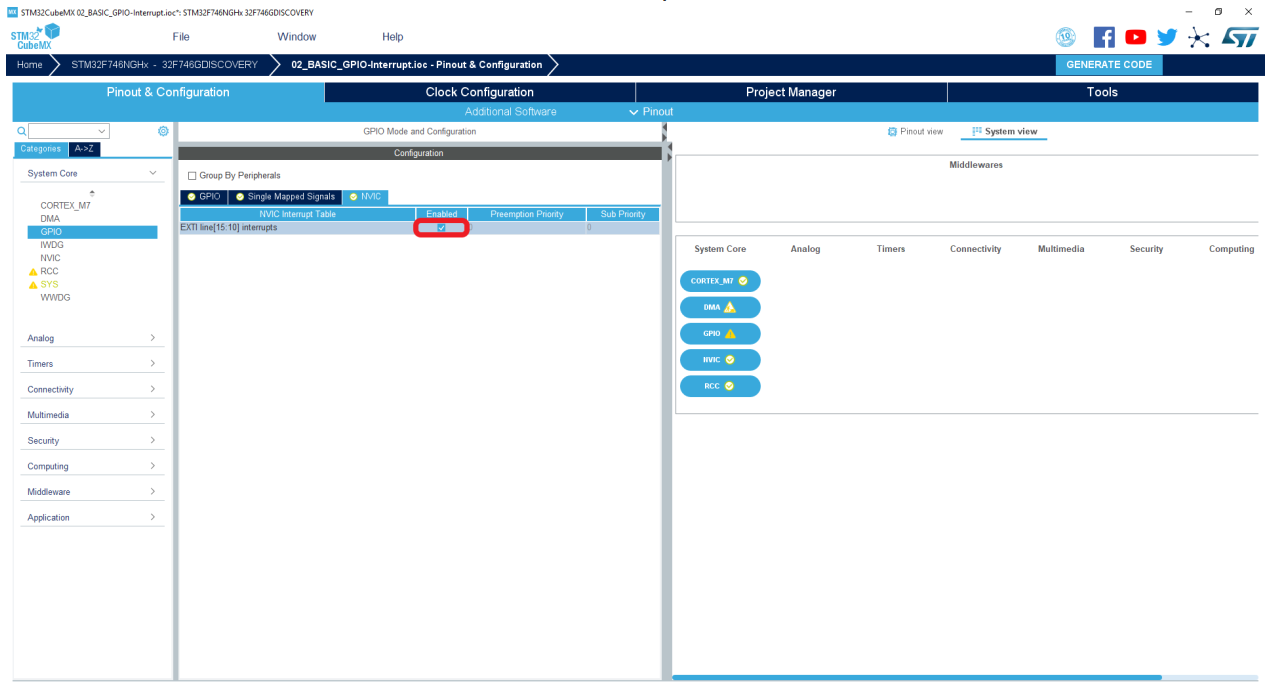
Set Port (PI1 set GPIO_Output and PI11 set interrupts (GPIO_EXTI11))
Set Project Name and Generate Code
After launching MDK , then find command and edit main.c
1 | /* USER CODE BEGIN 4 */ |
Compile code and test on STM32 and press black button then you can flicker LD1 by pressing blue button
Basic Example3
Set Port (PI1 set GPIO_Output and launch USART1)
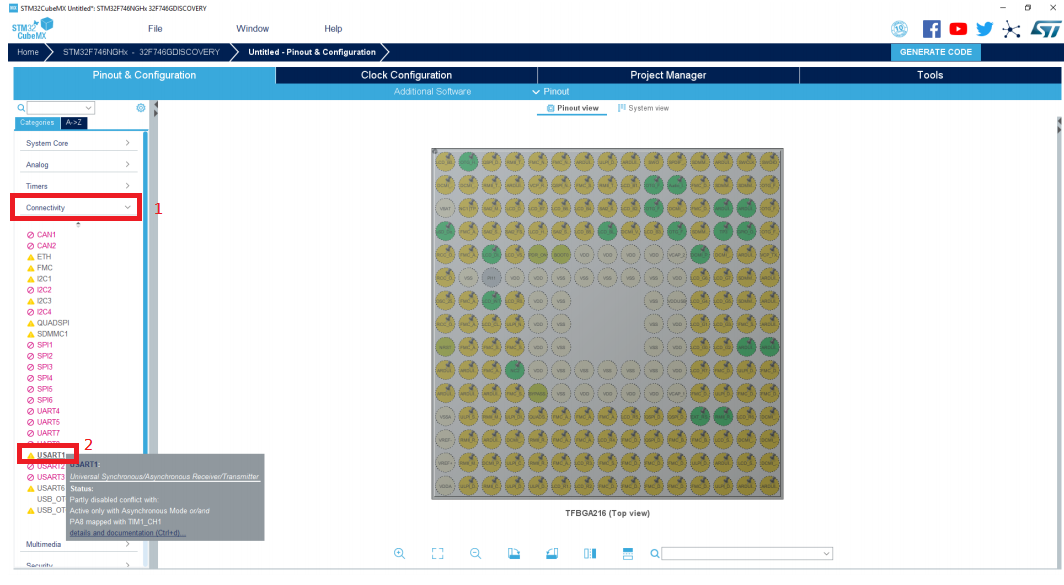
Set Project Name and Generate Code
After launching MDK , then find command and edit main.c
1 | /* USER CODE BEGIN Includes */ |
1 | /* USER CODE BEGIN 3 */ |
1 | /* USER CODE BEGIN 4 */ |
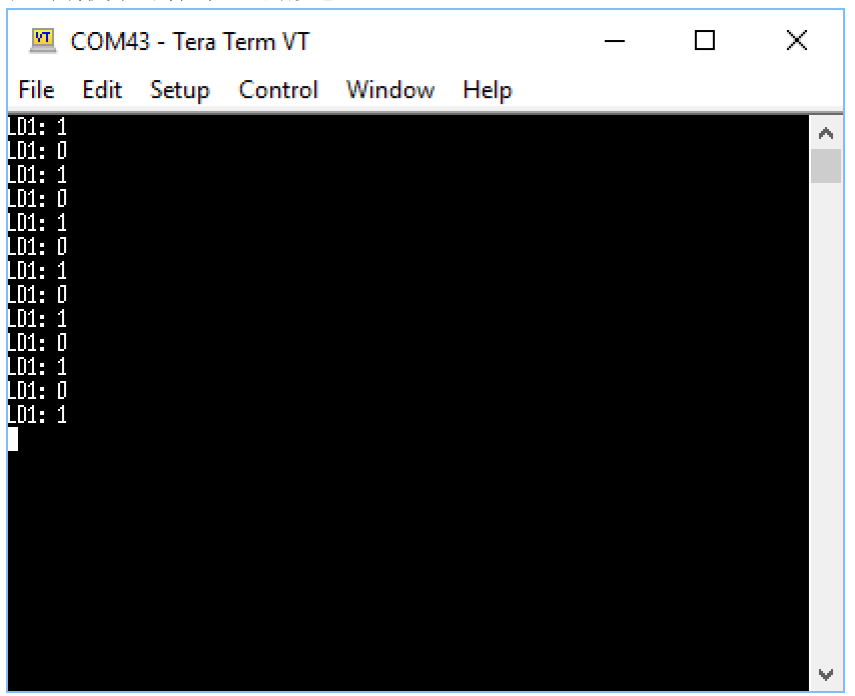
Compile code and test on STM32 and open TeraTerm
Show example2 on TeraTerm
Basic Example4
Set Port (PI1 set GPIO_Output and launch USART1)
Set Project Name and Generate Code
After launching MDK , then find command and edit main.c
1 | /* USER CODE BEGIN Includes */ |
1 | /* USER CODE BEGIN PV */ |
1 | /* USER CODE BEGIN 2 */ |
1 | /* USER CODE BEGIN 3 */ |
1 | /* USER CODE BEGIN 4 */ |
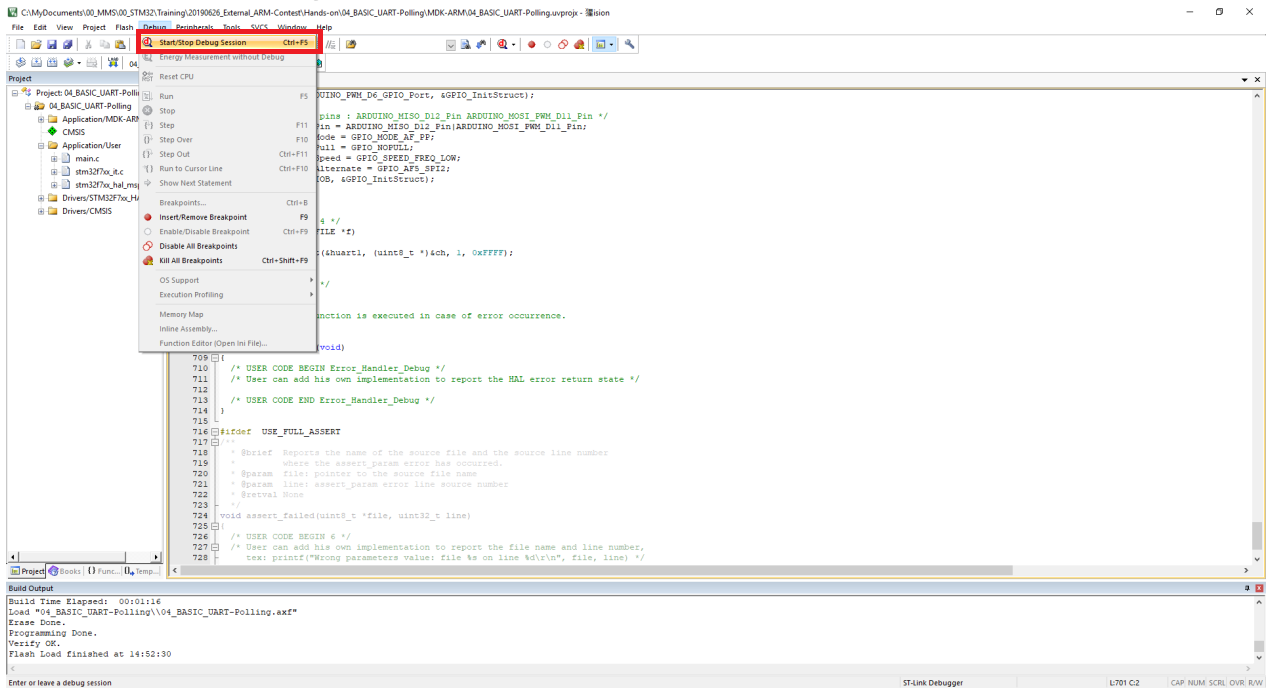
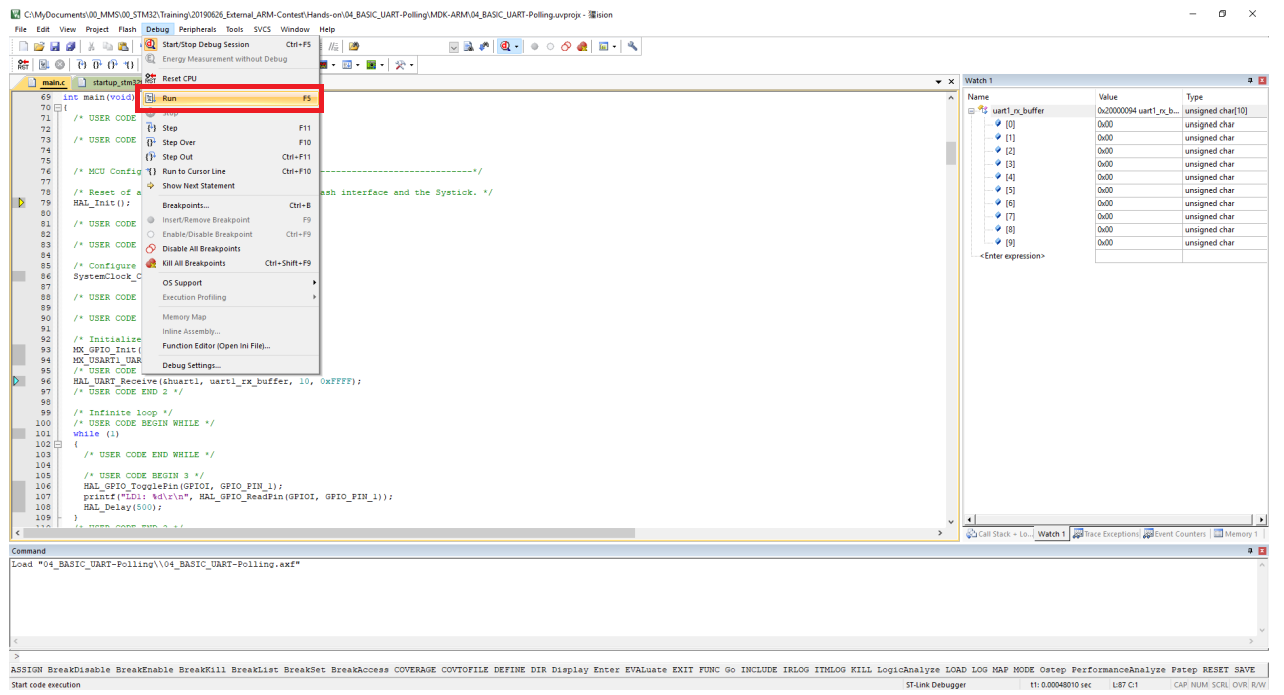
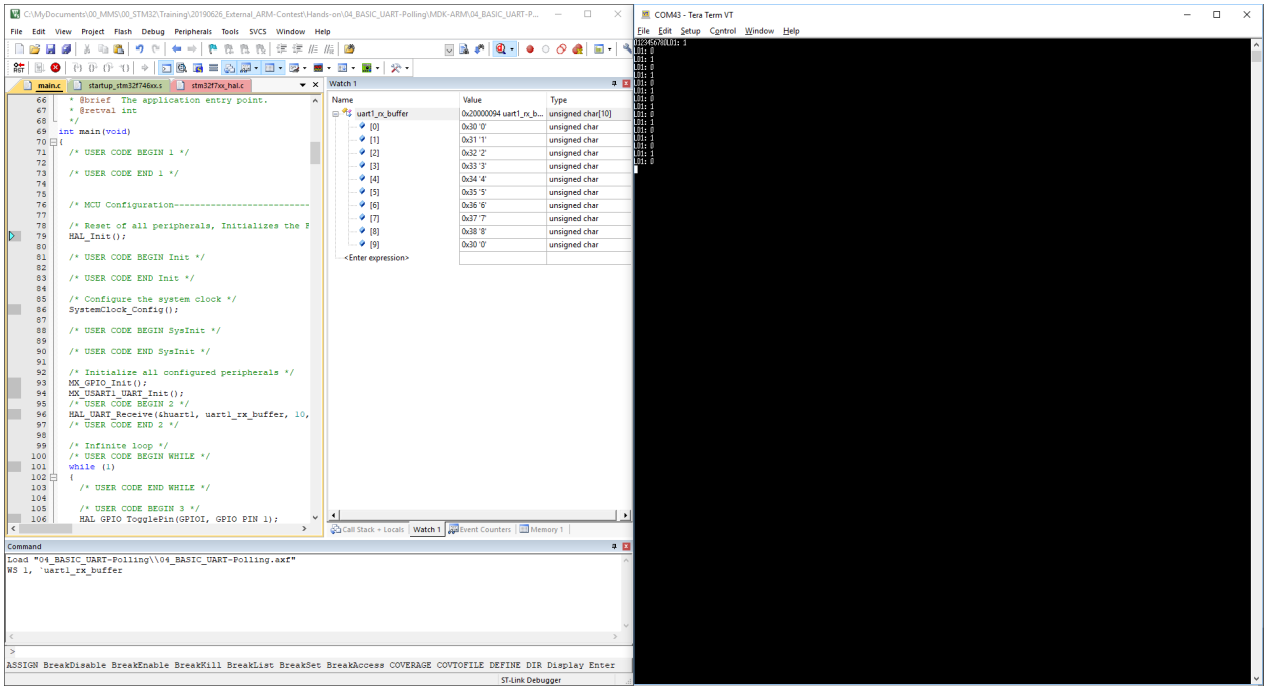
Compile code and test on STM32 and open debug mode
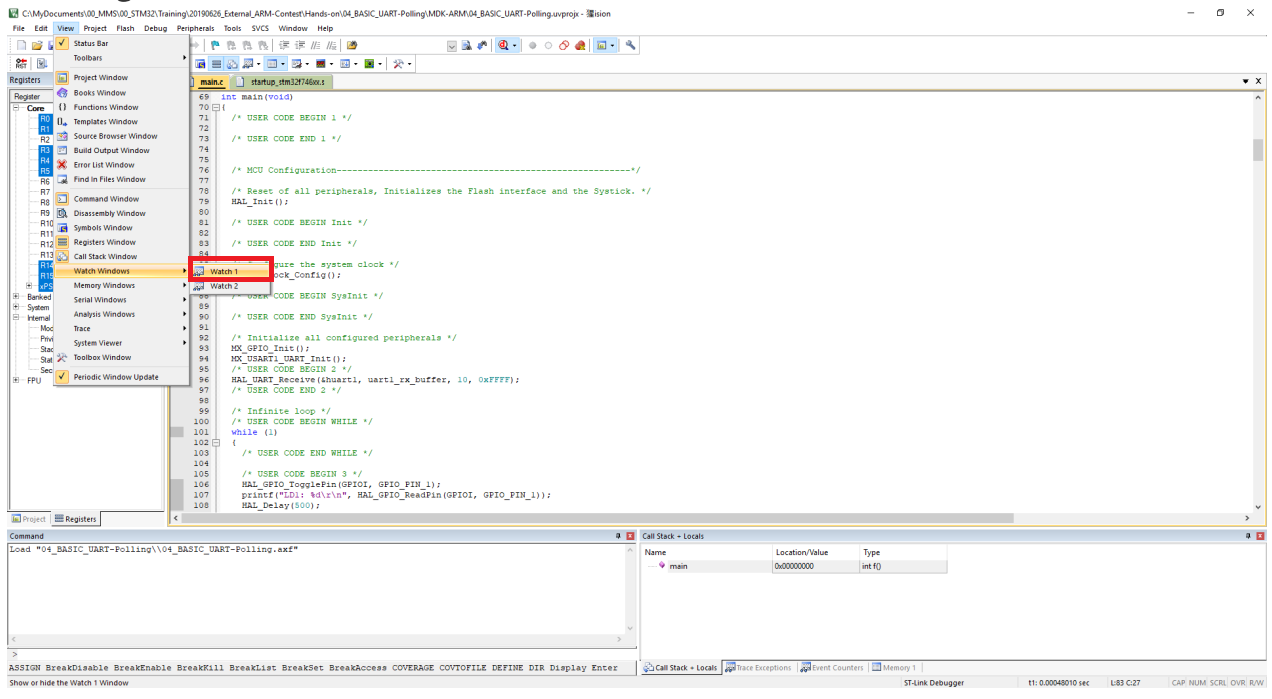
Open TeraTerm
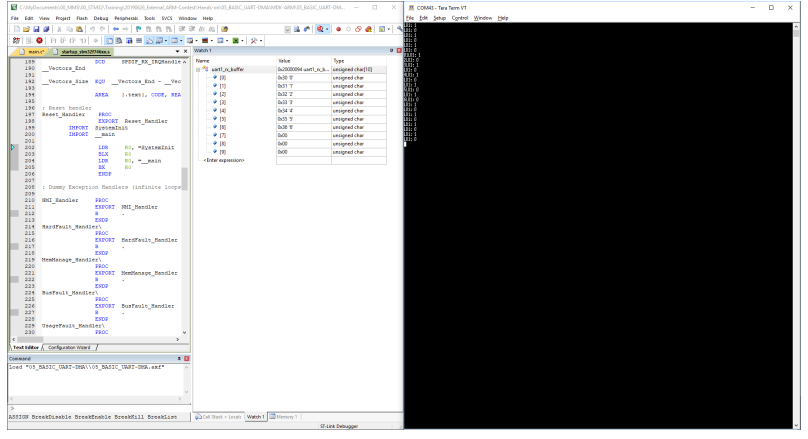
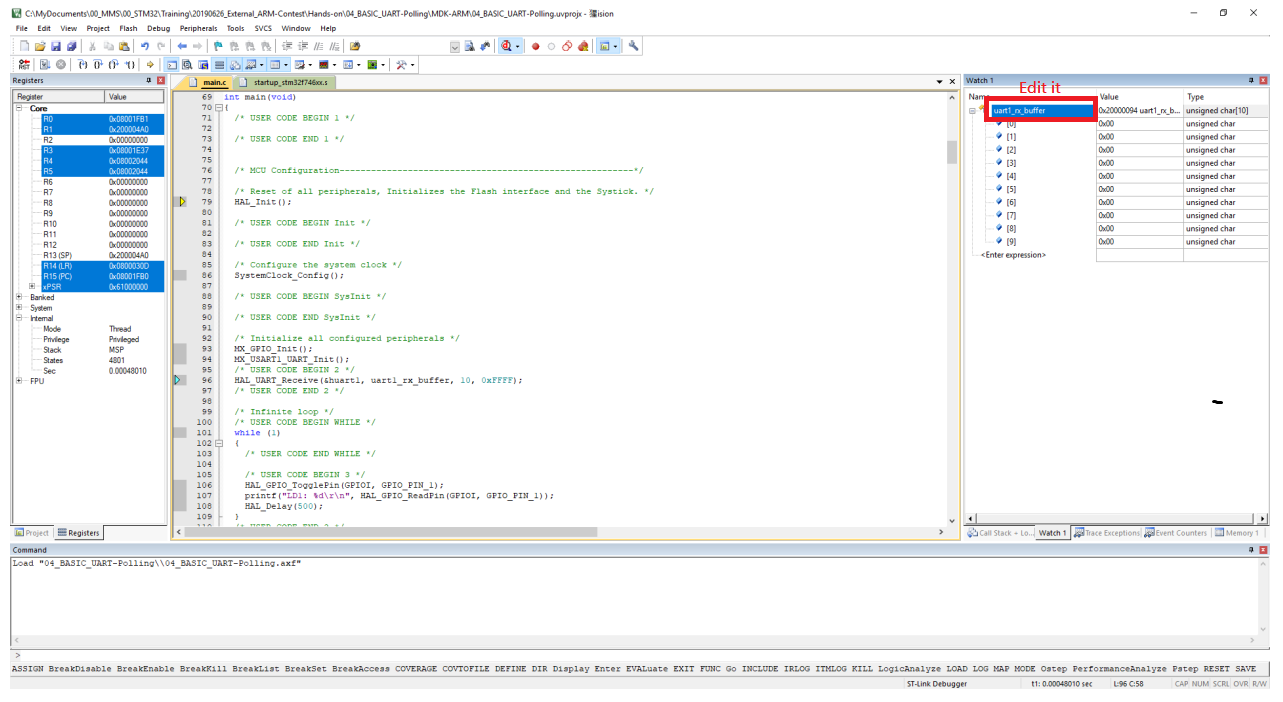
Input on Terminal and show on Watch 1
After ten inputs on Terminal
Basic Example5
Set Port (PI1 set GPIO_Output and launch USART1)
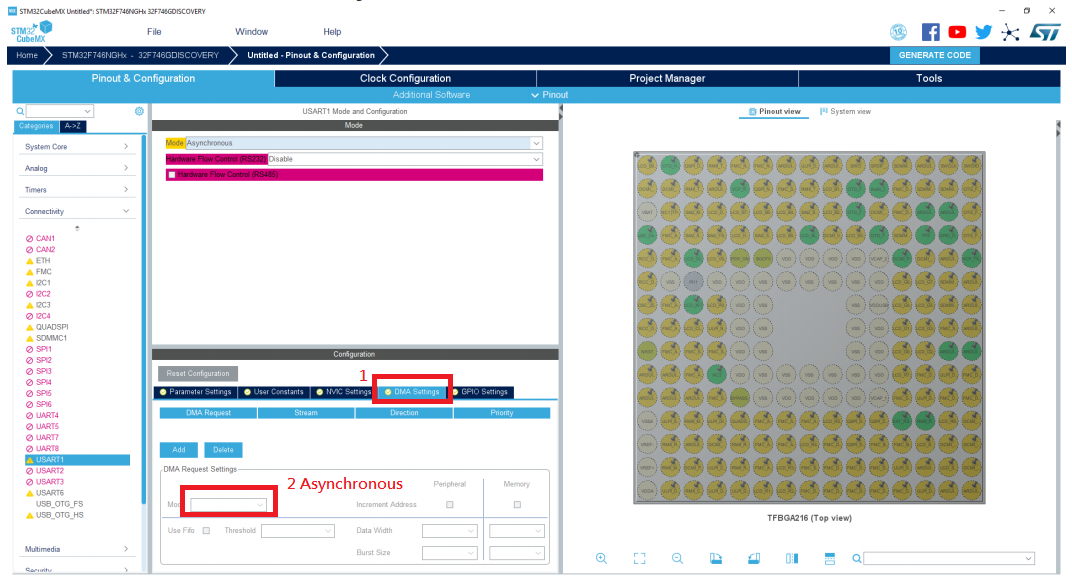
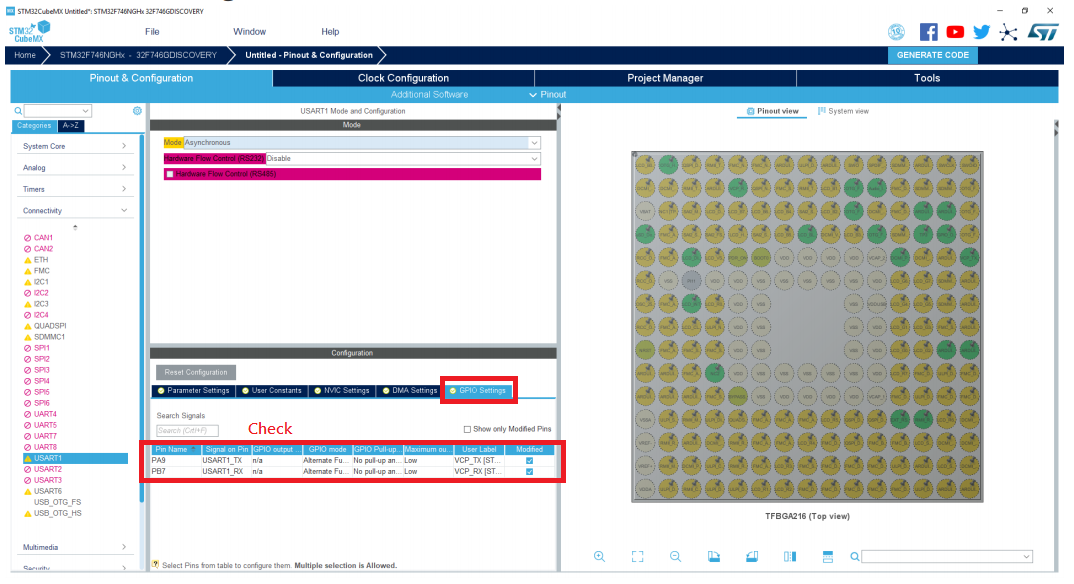
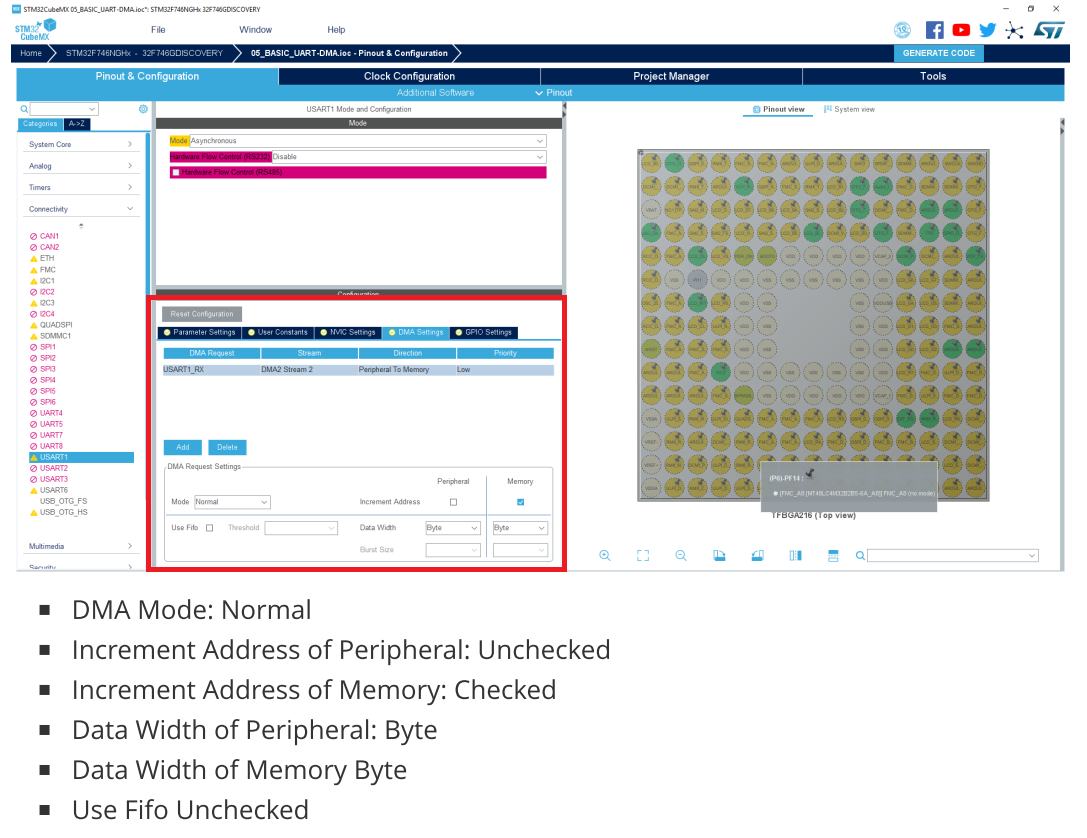
Setting DMA Settings
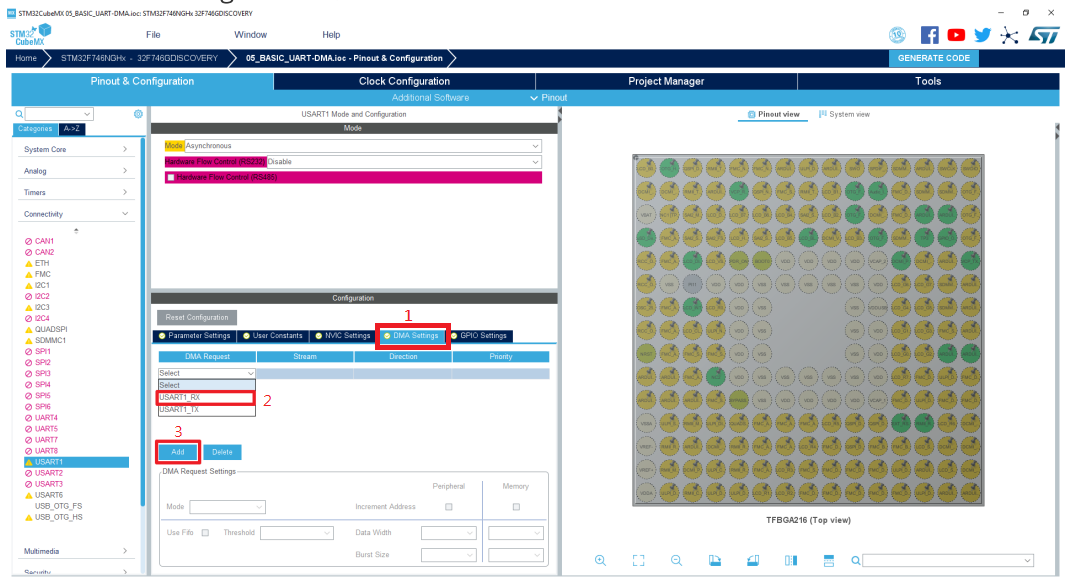
Check UART1_RX DMA
Set Project Name and Generate Code
After launching MDK , then find command and edit main.c
1 | /* USER CODE BEGIN Includes */ |
1 | /* USER CODE BEGIN PV */ |
1 | /* USER CODE BEGIN 2 */ |
1 | /* USER CODE BEGIN 3 */ |
1 | /* USER CODE BEGIN 4 */ |
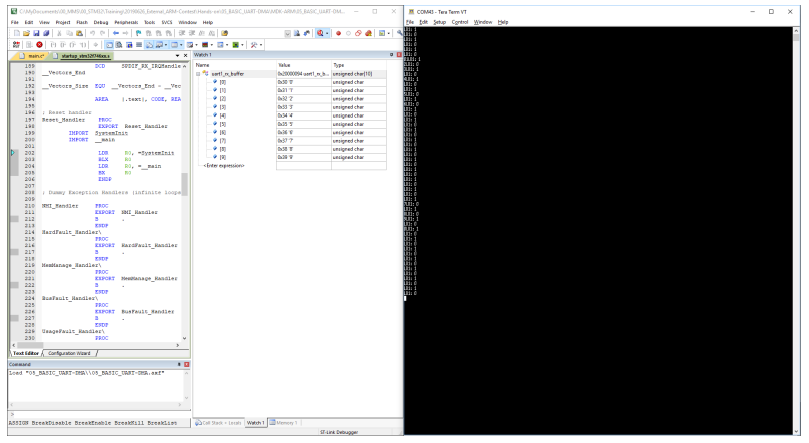
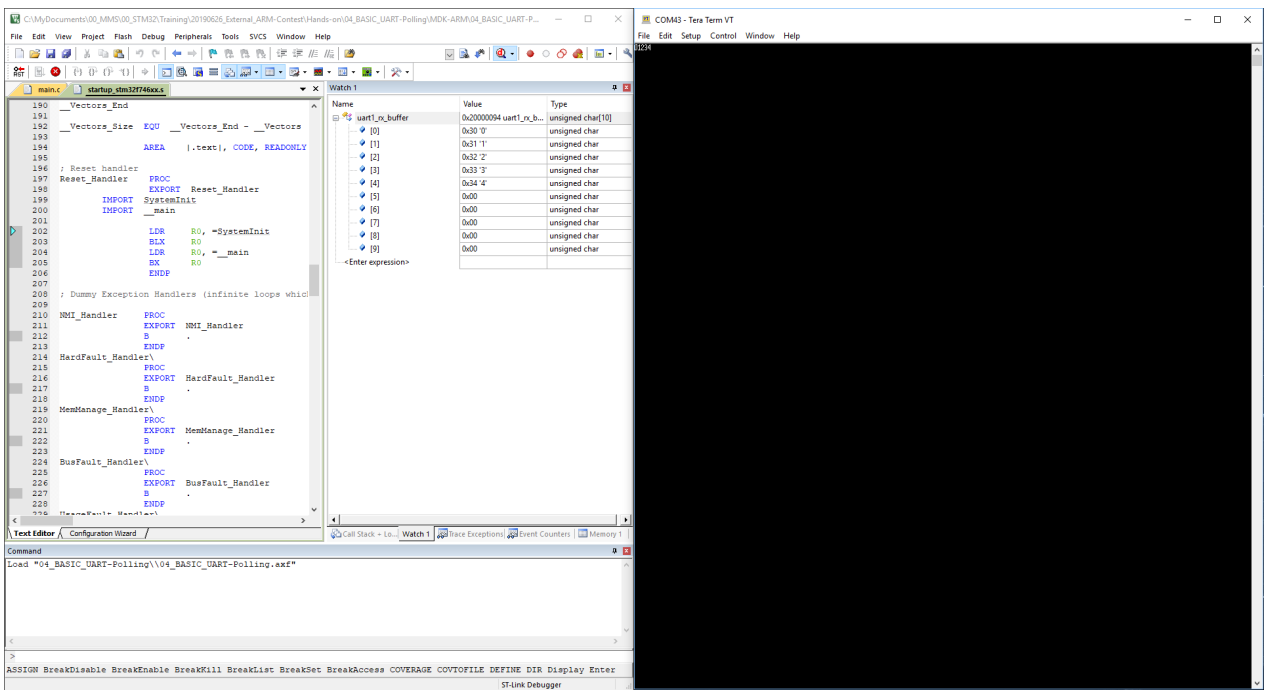
Compile code and test on STM32, open debug mode and edit watch 1
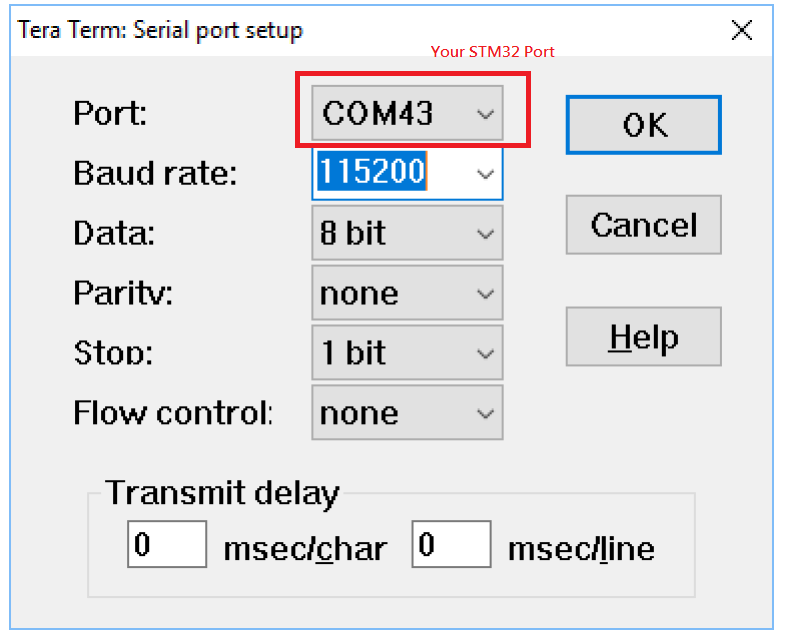
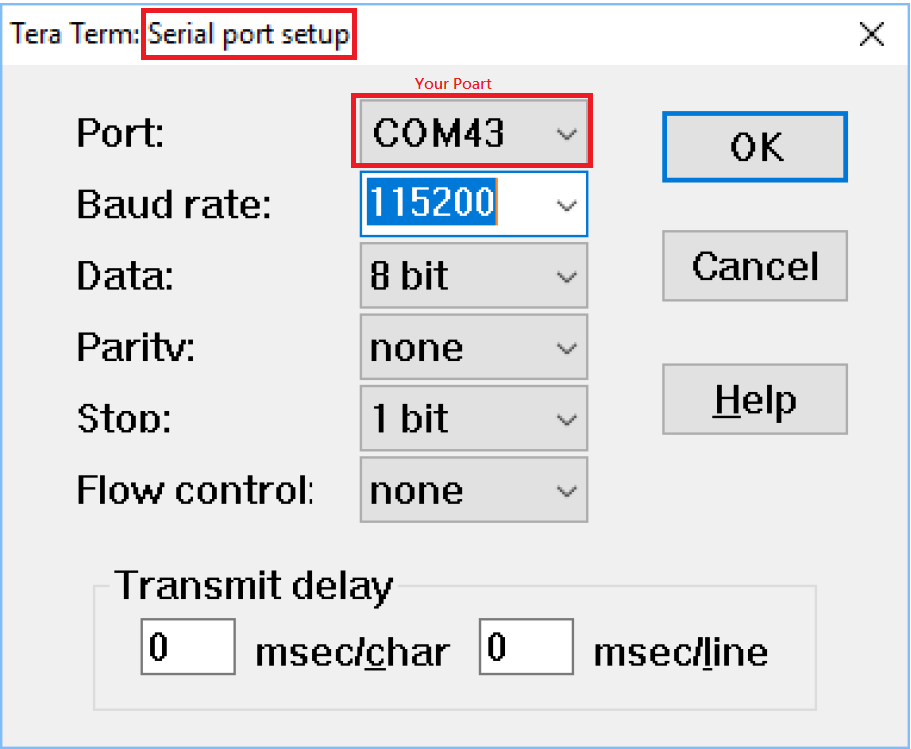
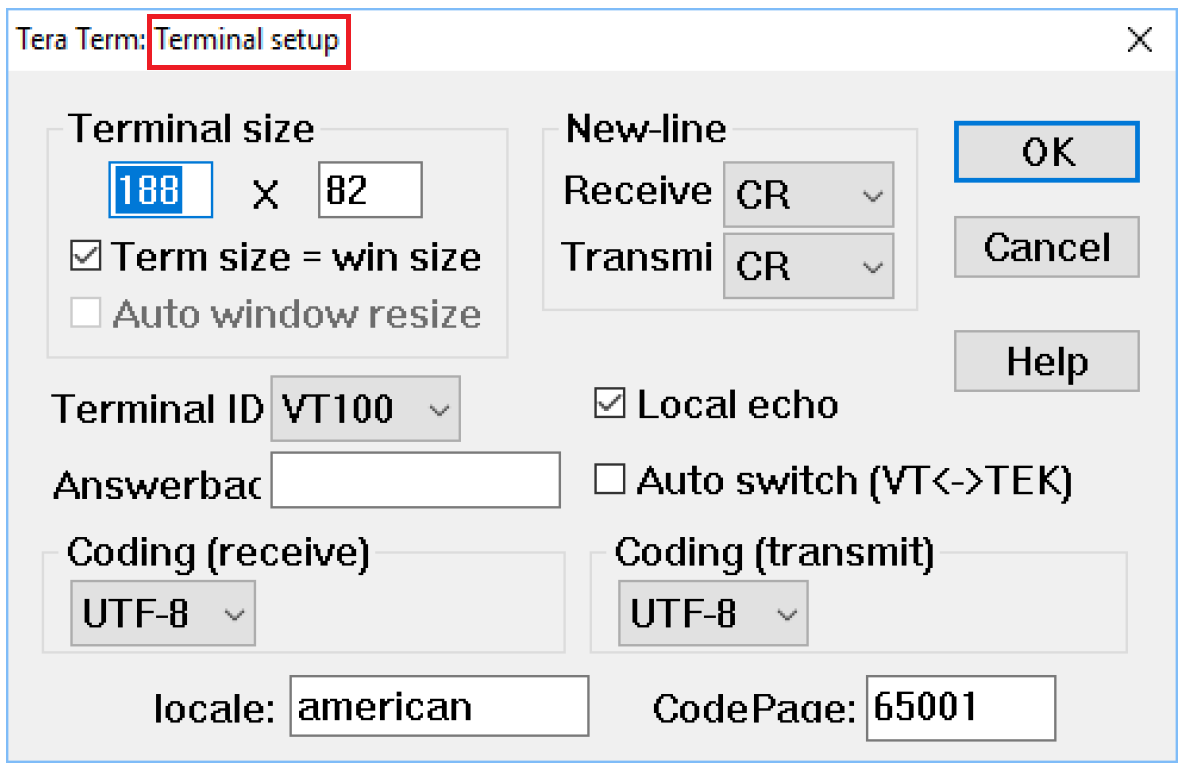
Open TeraTerm set Serial port and Terminal Setuo
Show final